
The purpose of this tool is to allow you to change reference levels without changing element’s location / elevation. The tool is going to do it automatically. It will set correct offsets for you.
No longer, you will have to manually calculate them. Simply choose new level (or use other provided option) and it will be done. Moreover, because the tool changes the offsets and levels at the same time your Revit model will not explode in the process.
Who should use this tool?
This tool was created with Revit Modellers in mind. It easily saves them countless hours each year.
I came out with the idea of this tool when I had to change manually references of almost all elements in the projects. This tiny tool would save us at least 2 weeks of work.
Link to the Autodesk App Store
Leveler Version 1.1
Please find below the list of some new features. You can click on them to go to the documentation.
 1. Level Names
![]() 1.1. Rename Levels with Menu
1.1. Rename Levels with Menu
![]() 1.2. Find and Replace in Levels Names
1.2. Find and Replace in Levels Names
![]() 1.3. Rename Levels Up
1.3. Rename Levels Up
![]() 1.4. Rename Levels Down
1.4. Rename Levels Down
![]() 1.5. Add Prefix or Suffix to Levels
1.5. Add Prefix or Suffix to Levels
 2. Edit Levels
 3. Grid Names
![]() 1.1. Rename Grids with Menu
1.1. Rename Grids with Menu
![]() 1.2. Rename Grids Up
1.2. Rename Grids Up
![]() 1.3. Rename Grids Down
1.3. Rename Grids Down
![]() 1.4. Add Prefix or Suffix to Grids
1.4. Add Prefix or Suffix to Grids
Buttons by Options
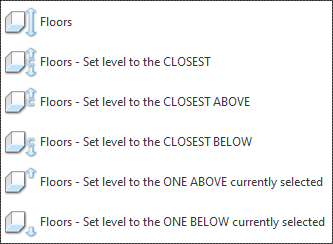
Each of the buttons has 6 different option you might use.
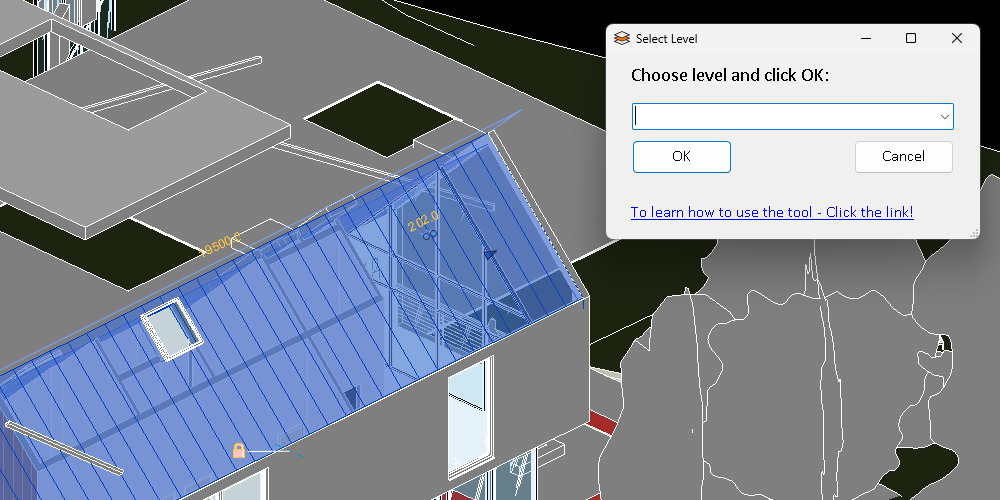
Default


You will be prompted to choose one level and the tool will try to set it for all selected elements:
Set level to the Closest


The tool will automatically choose the closest level (the one which will result in the smallest offset) for each selected elements.
The levels will be calculated separately for all selected elements.
Set level to the Closest Above


Similarly, The tool will automatically choose the closest level for your elements, but this time it will look only for a level which elevation is above the selected elements. The levels will be calculated separately for all selected elements.
For example:
if you have a floor between two levels, the tool will always assign the level above your floor - even if the offset would be comparable larger than to the level below.
Set level to the Closest Below


Similarly, The tool will automatically choose the closest level for your elements, but this time it will look only for a level which elevation is below the selected elements. The levels will be calculated separately for all selected elements.
For example:
if you have a floor between two levels, the tool will always assign the level below your floor - even if the offset would be comparable larger than to the level above.
Set level to the one above currently selected


The tool will automatically change the reference level to one above currently selected. The levels will be calculated separately for all selected elements.
For example:
if you have a floor on level 1, it will change its reference to level 2 and its offset to -3000 mm.
Set level to the one below currently selected


The tool will automatically change the reference level to one above currently selected. The levels will be calculated separately for all selected elements.
For example:
if you have a floor on level 2, it will change its reference to level 1 and its offset to 3000 mm.
Buttons by elements
Please find below a short description with information how each category works. We also included some information about limitations of this tool. By default the tool filters out all model-in-place families.
Levels - Objects With One Reference
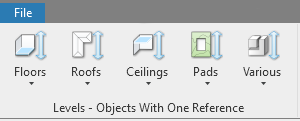
This tab contains tools for elements with one reference level.
Floors
Works on default system floors.
Roofs
Works on all 3 different system roofs (Roof by footprint, Roof by Extrusion and Roof by Face)
Ceilings
Works on standard system ceilings.
Pads (for older versions of Revit (pre-2024))
Works on building pads. This function is included only in versions up to 2023.
Experimental! Various With One Reference
It is an experimental option. In theory it should works on many categories but right now it is limited to:
Structural Fundations
Reavels
Wall Sweeps
Furiture
Parkings
Mechanical Equipement
Ligting fixtrures
Plumbing fixtures
Generic models
Please inform us if you see any problems or would like us to include another category of objects to it. Adding more categories is on our ToDo list.
Levels - Objects With Two References
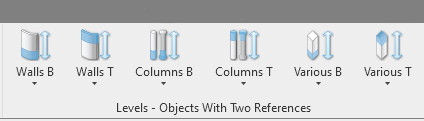
This tab contains tools for elements with two reference levels (Top and Bottom). The tool is also allowing to select Unconnected Level for them.
Walls
Bottom
Top
Works on system walls and curtain walls.
Columns
Bottom
Top
Works on architectural and structural columns.
Experimental! Various With Two References
Bottom
Top
It is an experimental option. Works on many categories and because of that it is really hard to include all scenarious. Should be fine, but please inform us if you see any problems or would like us to include another category of objects.
Works on:
Generic Families
Shafts
Straight Wall Openings
Stairs
Ramps
etc.
Things to keep in mind:
2 level based families - Top Level can’t be set to “Unconnected”. It is default Revit limitation so we can’t do anything about it. I didn’t know about it too.
Ramps - Ramps are broken in Revit - For more info visit:
Revit Ramps
In short : Please don’t select “Unconnected” and do not use the tool on ramps where level is set to “None”.
Levels - Other Objects
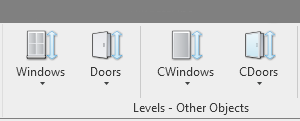
Doors
Works on standard door families hosted on the walls.
Windows
Works on standard window families hosted on the walls.
Experimental! Curtain Doors
It is an experimental option.
Did you know that Revit API allows you to change the level of curtain panel doors? It is a highly experimental option, so use it wisely. One thing to keep in mind is that editing curtain wall sometimes overwrites these settings back to default ones (base of curtain wall).
Experimental! Curtain Windows
It is an experimental option.
Did you know that Revit API allows you to change the level of curtain panel windows? It is a highly experimental option, so use it wisely. One thing to keep in mind is that editing curtain wall sometimes overwrites these settings back to default ones (base of curtain wall).
Video
Versions
Version 1.0 was published at 2023-10-18. Works on Autodesk Revit 2020 - 2024