W7k Academy - Learning how to code in Revit API part 1
Hello, my fellow Revit People,
I’ve noticed lately a surge in discussions about the differences between Dynamo and scripting. These conversations often get quite passionate, with people fervently defending their preferred approach. At the same time, I’ve observed some misconceptions about coding. Some of them originate from circulating snippets of code, which are rather poorly written (especially in Python). I observe that people instead of embracing the power of coding, try to do the same thing they did while using Dynamo (the same way of thinking, design patterns etc).
All of it creates an impression that using RevitAPI is harder and more complicated than it is.
As a person who personally created one of the largest collections of scripts for Revit available online, I decided to start a small series of posts, “Academy”, where I will share with you some parts of my code. Now, let me be clear: my scripts are not perfect. There are areas that could be improved (please don’t hesitate to tell me! - we are all learning here). Still, I hope that by sharing them, I can shed some light on my thought process and how I tackle various challenges.
What we will code today:
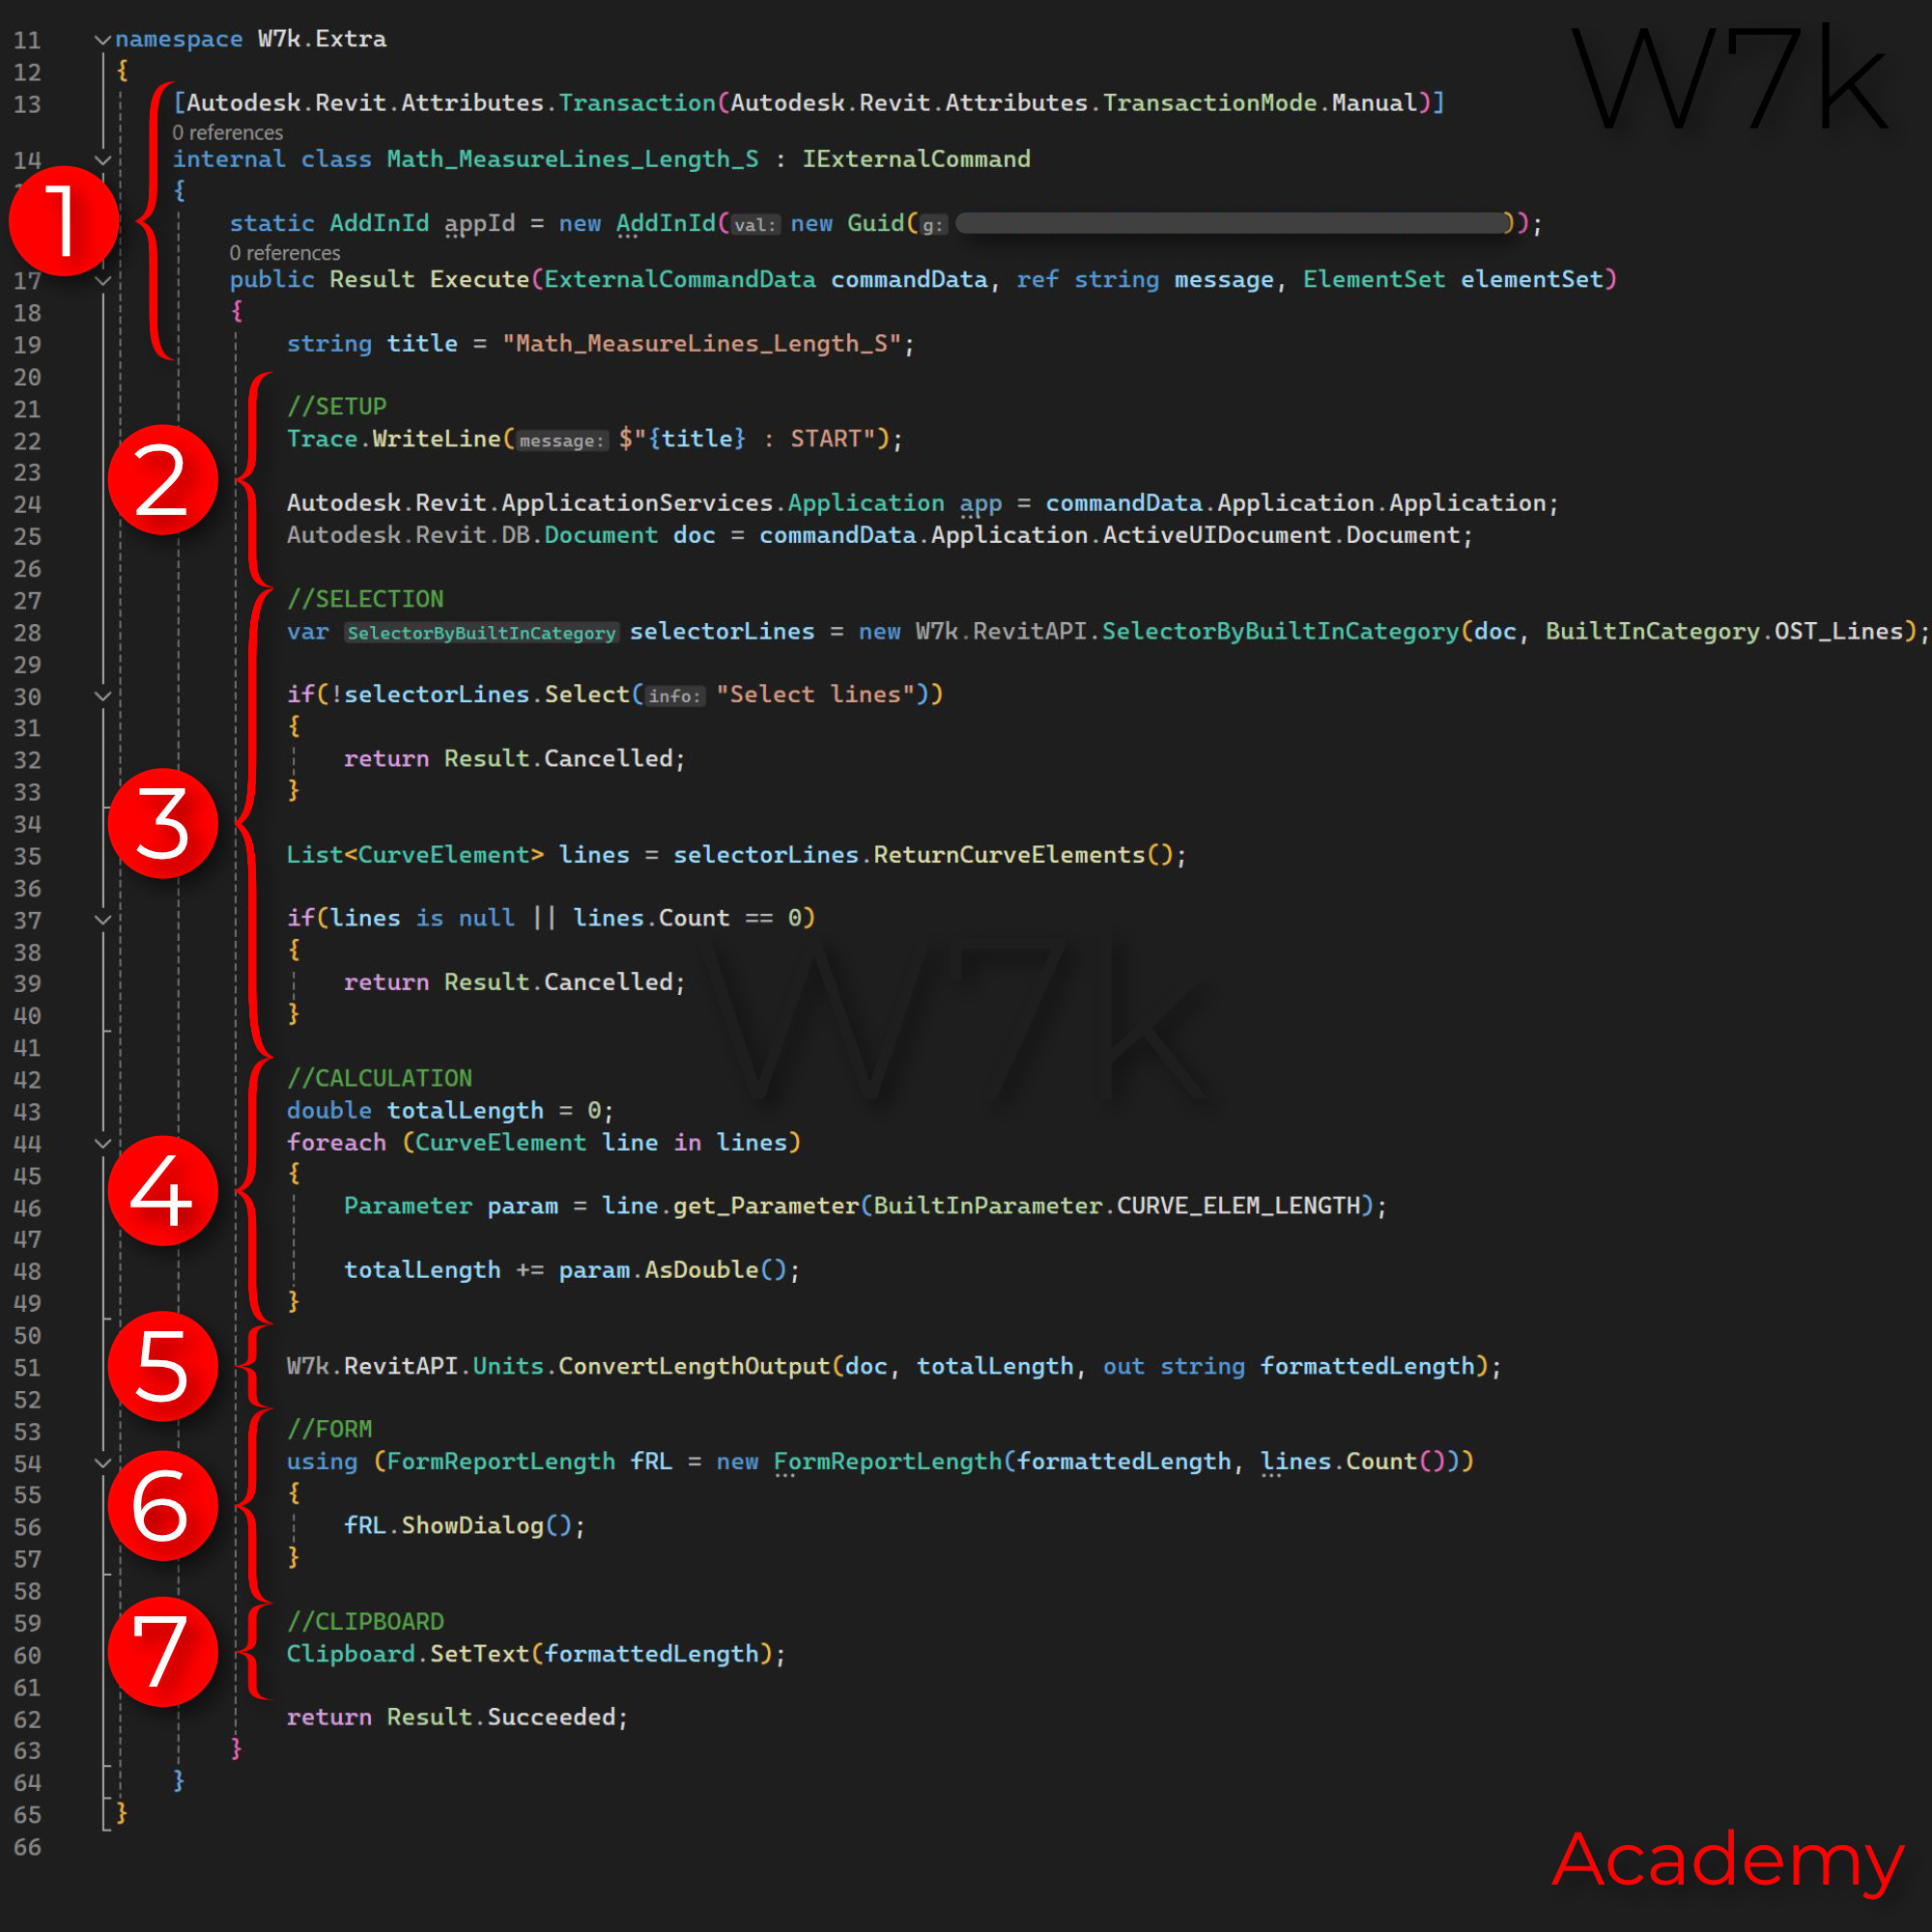
Today I will explain shortly how one of scripts from my free add-in Extra works. The aim of this script is to do something super easy - to calculate the total length of multiple selected lines. Later the script shows it to the users and copies it to their clipboard.
1. Let’s start!
So, we start with internal class which implements IExternalCommand Interface. It is a sort of a “spell” we will be calling in the other part of our tool.
Everything there is standard, and you don’t really need to understand it right now. The only thing you need to change is the class name and its Guid – it is an unique number you give to your tool, and that’s why I decided to hide mine. edit. Not necessary at all, you can delete this line.
One important thing to note here is that external commands “return” the “Result”. It means that your script needs to tell Revit what happens when you run your script – In this script we are using two different choices – Result.Cancelled (something didn’t work out and we had to cancel everything we did) and Result.Succeeded (It worked!).
2. SETUP
My standard starting point – I declared there two objects (one is Revit document and other is applications). It is worth checking “Document” as most of the time you will somehow interact with it.
3. SELECTION
In this part of the code, I am selecting the lines I will measure.
Firstly, I made a new object – selectorLines. It is an object from my personal class “SelectorByBuiltInCategory”. Inside it there is right now around 600 lines of code helping me with selecting elements. The most important part of it is its method Select.
In 60 lines of code my selector checks current selection, filters it and if it is empty its prompts user to “Select lines”. In case of failure, it returns “False” – it stops the script from working by returning Result Cancelled.
So instead of writing and managing 60 lines of code, I have 3. Instead of multiple if, try, catch, another if, I am simply asking my selector to select lines. You don’t really need comments to understand what’s going on there.
After that I am simply asking selector to save these lines as CurveElement inside a list of “lines”.
The last “if” is redundant. I don’t really need it as there is probably no reason why this code could give you an empty list. Still better safe than sorry.
4. CALCULATION
Calculation is simple. I declare “totalLength” and I iterate through selected “lines”. In each line I look for special BuiltInParameter.Curve_Elem_Length – as name suggests it is simply how Revit keeps Parameter Length. I read the value of this parameter “as double” and I add it to the total length.
5. CONVERSION
Probably everyone is aware that Autodesk created its own SI units system (frankly speaking two of them). It is a mix of International System of Units with feet for length. So all your projects are by default written in feet.
To help with converting it back and forth RevitAPI gives us a class UnitFormatUtils. Due to some changes in 2020, on top of that, I built my personal static class (similar thing to a function in python) ConvertLengthOutput. It gives me formatted Length as a string (as a text).
6. FORM
When you get to this point Revit will show you the form. It is a simple WinForms – I hope to make a short post about them in the future.
7. CLIPBOARD
Just to make it slightly nicer I am using system class Clipboard which sets a value in your clipboard in Windows. Now you just need to press ctrl+V.
8 END
That’s everything about it. The code is rather self-explanatory, and by building more complex structures I made it more readable by humans.
If you like this post, please comment, share it, and follow me for more! Also buying my tools helps me a lot!
For Drafter please visit: Link to Drafter